Migration 101: How to Switch to a New Web Host (and Why)
Published: April 18, 2018 / Article by: Siarhei KulichOne day, this dreaded moment will come. Your website, blog, or online store will outgrow its present premises, and you will realize that you need to change your web hosting provider. Perhaps you will simply run out of space due to the scaling of your business, or maybe you’ll be constantly hitting maximum bandwidth. Or your customers or subscribers will start complaining that pages take ages to load. Too much downtime, unsatisfactory tech support, or simply high prices – reasons for a move are many. Whatever it is you may be looking for – more space for your blog, more bandwidth for expanding your online store, or 24/7 support chat – one day, you’ll need a new host.
Before the Switch
1. Do your research. At this preparatory stage, invest your time and effort to find the hosting that can satisfy your needs. You may have to spend many hours comparing different various hosting offers – do it! Calculate how much space and bandwidth you need and choose the hosting that you hopefully won’t have to change again for a few years.
2. Control panel matters – choose a hosting that employs the same control panel as your present one, be it cPanel, Plesk or something else. It will make migration much easier, especially if you want to do it yourself.
3. Test the response. Once you find a hosting provider that suits both your present and future needs, make sure to discuss the details of both the offer and the migration carefully – this is the moment when you test how the new provider interacts with its clients. Do you receive prompt and full replies to all your questions? Do the hosting people seem well-informed and professional?
4. Wait to tell your current host! Do not tell your present hosting that you are moving; otherwise, they will just cancel your subscription (which is supposed to be in your own interest, since you’ll get a refund for unused days), and you will lose lots of valuable files – clients’ details, comments, user profiles… In fact, even after the migration is over, wait to cancel your current subscription for a week so, just to test that everything is running smoothly with your new host.
5. Do your backups. Log in to your control panel (with cPanel, it is done by entering either yourdomain.com/cpanel or cpanel.yourdomain.com), go to the backup section and first perform a backup of your whole site (from your file manager):

then back up all your MySQL databases individually:

6. Decide if you want to switch to HTTPS. HTTPS is a much more secure protocol than HTTP since it doesn’t allow data to be corrupted, intercepted, or manipulated. That’s why Google is currently encouraging HTTPS by giving a slight ranking boost to those websites that use it. Even though it is often called “migration to HTTPS“, it does not require migrating to some special web hosting. The switch can be done with just about any host – you just need to purchase the so-called SSL certificate and change the URLs on your site. Note that you don’t have to migrate to a new hosting to do the switch.

7. Let your visitors know you are migrating. Even though migrations can be done with little or no downtime, it is wise to put up a banner on your site letting visitors know when you’ll be migrating. This will reduce traffic and possible complaints.
Do I Have to Transfer My Domain, too?
Many hostings will try to convince you that you have to transfer your domain from your present registrar to theirs. It is NOT true. Website hosting and domain hosting are completely separate things. If you are happy with your present registrar, don’t change it. You will just have to change the current DNS server information to the addresses that your new host will give you.
Making the Switch
1. Choose who’s going to do it. Many hosting providers offer to migrate your site for free, if it is not too large or complex. In this case, the migration will probably take less than a day (as little as a couple of hours in case of small websites), and you’ll experience very little or no downtime. If your site is large, the service may cost you around 100 USD. If you’d rather concentrate on your writing or managing your online business, choose this option. However, if you feel confident around computers, you may want to migrate your site yourself – in which case, read on.
2. You have already done all your backups, right? Now log in to your new host’s control panel account and upload them (the full backup of the site and all individual MySQL databases) to the new server – it is usually done in the Import section.

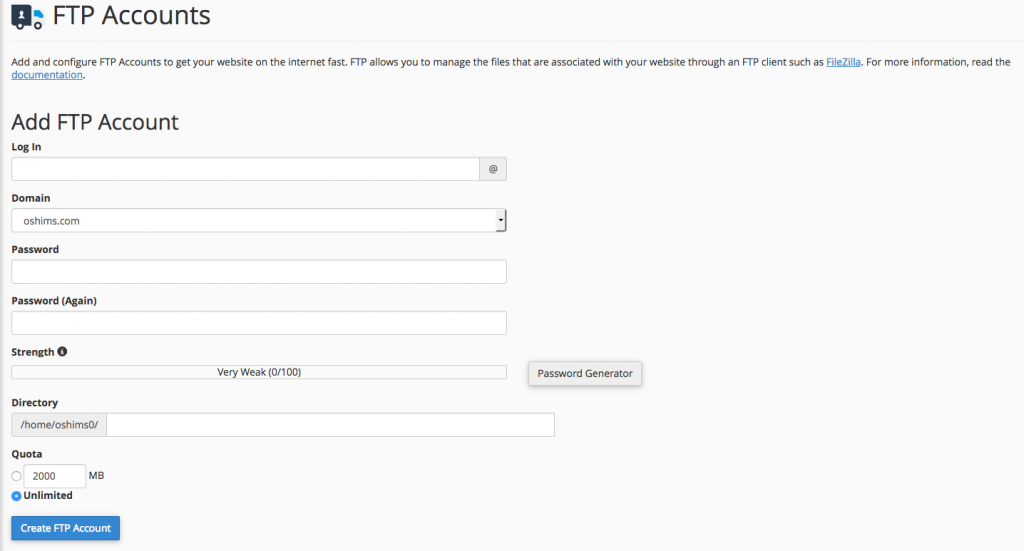
3. Add all necessary usernames, passwords …

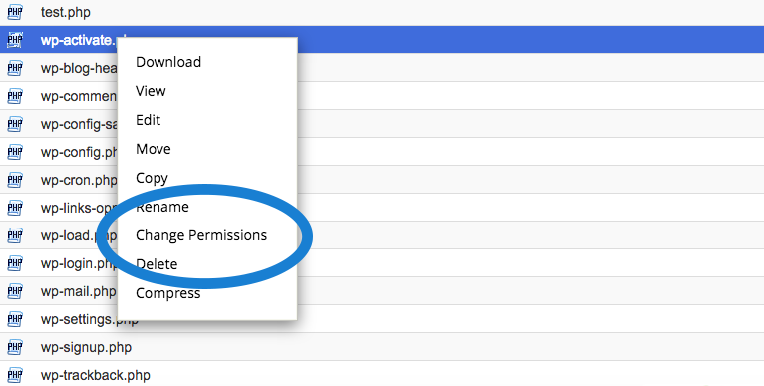
…and permissions associated with each SQL database in the MySQL section of the control panel.

4. Log in to your domain registrar account and point it to the new domain name servers provided to you by your new host. While the changes are taking place (which usually takes up to 24 hours), do not make any changes to your website. During this time, visitors should be able to use both the old and new website, and you should experience little or no downtime. Note that your new DNS info may take a couple of days to fully spread across the web (it is called DNS propagation).

After the Switch
1. Test everything. Only you know how your website should really work, so test every page of it. And if everything works just fine…
2 …Cancel your old hosting plan! Now, finally, it is time to make that call or send that email to say goodbye to your old host.
No matter which method of site transfer you choose, remember: a properly done migration is one that your visitors and customers won’t notice. Therefore, invest your time and energy to ensure smooth and thorough migration; and use this potentially daunting moment as a chance to acquire valuable new experience.
I wish i could have found this article earlier, i shifted my domain from Namecheap to Hostnoc and i faced trouble while transferring it. Well, thanks a ton for this information.